
画像の色加工1
-colorspace -monochrome -negate -sepia-tone

ここでは、Imagemagickで画像の色に関する変更を行う方法を紹介します。
1. グレースケール画像の生成
convert <変換前の画像名> -colorspace gray <変換後の画像名>
例)convert before.jpg -colorspace gray after.jpg
▼実行結果
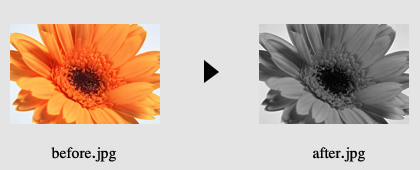
例)convert before.jpg -colorspace gray after.jpg
▼実行結果
画像をグレースケールに変換するには、以前画像のカラーフォーマットを変更する際にご紹介した-colorspaceを使用します。
-colorspaceのプロパティとして、grayを指定することで、画像をグレースケールに変換することができます。
2. カラーの反転
convert <変換前の画像名> -negate <変換後の画像名>
例)convert before.jpg -negate after.jpg
▼実行結果
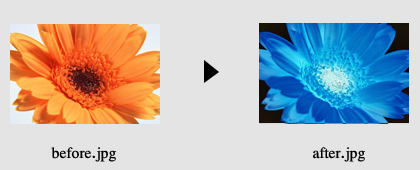
例)convert before.jpg -negate after.jpg
▼実行結果
画像の色を反転させるには、-negateを使用します。
3. モノクロ画像の生成
convert <変換前の画像名> -monochrome <変換後の画像名>
例)convert before.jpg -monochrome after.jpg
▼実行結果
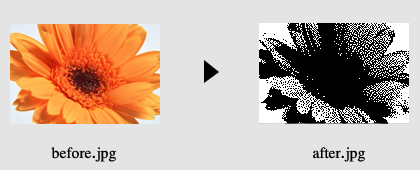
例)convert before.jpg -monochrome after.jpg
▼実行結果
-monochromeを使用すると、画像がモノクロ2階調画像になります。
4. セピア調画像の生成
convert <変換前の画像名> -sepia-tone (percent)% <変換後の画像名>
例)convert before.jpg -sepia-tone 80% after.jpg
▼実行結果
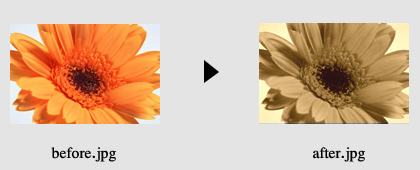
例)convert before.jpg -sepia-tone 80% after.jpg
▼実行結果
Imagemagickには、画像をセピア調に変換するオプションも用意されています。
-sepia-toneに任意のパーセンテージを指定することにより、画像がセピア調になります。
パーセンテージは1~100まで任意の数を指定できますが、マニュアルによると 80% が一番セピアっぽくなるよと書かれているので、サンプル画像は80%で生成してみました。
このページでは、画像のカラーに関する変換オプションを紹介いたしました。
実はimagemagickでは、コントラストや明るさなどさらに細かく画像の色調を調整することができます。
それに関しては、次の項目で説明したいと思います。
最後までお読みいただきありがとうございます。お役に立てましたなら嬉しいです。